Be yourself; Everyone else is already taken.
— Oscar Wilde.
This is the first post on my new blog. I’m just getting this new blog going, so stay tuned for more. Subscribe below to get notified when I post new updates.
easy to make, affordable vegan food
Be yourself; Everyone else is already taken.
— Oscar Wilde.
This is the first post on my new blog. I’m just getting this new blog going, so stay tuned for more. Subscribe below to get notified when I post new updates.
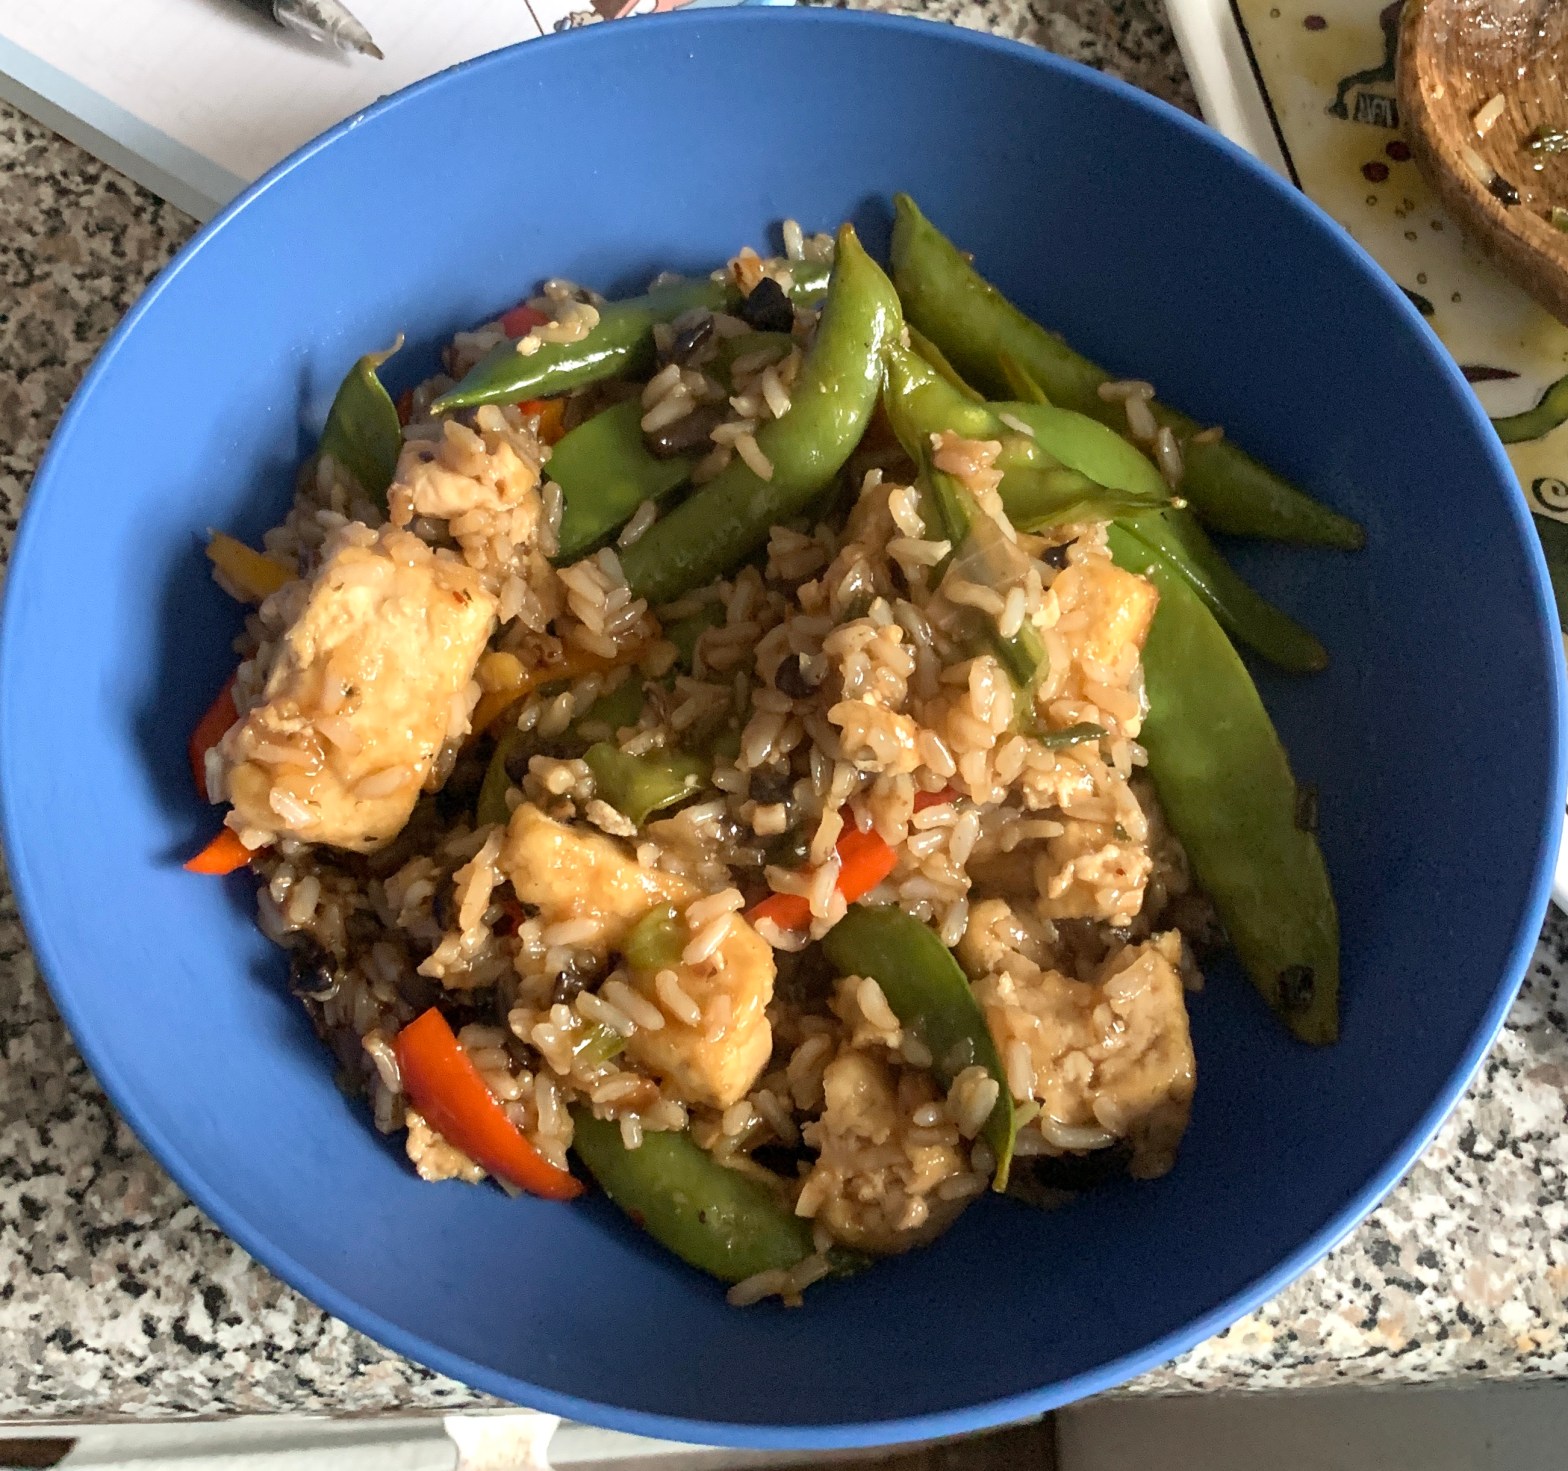
A few weeks ago I ate at a restaurant in Augusta called The Hive. They have a few vegan options, but I decided to go with the Yaki Bowl, one of their vegan options. It’s served over your grain of choice (I went with brown rice) with a bunch of seasonal veggies and tofu if you decide to go for that.
I took one bite and fell in love. I’ve always loved Asian food, so this was right up my alley. I’ve been doing this thing recently where if I find something I like at a restaurant, I do my best to go home and recreate it. This one was one of the very easy ones.
All in all, this took me about an hour to do. Most of that was prep and me scrambling around my kitchen in a panic because that’s just how I do things.
I’m not gonna lie, most of the recipes on my blog so far (and the ones to come) are my first tries. I usually don’t try something a million times until I perfect it, I usually just get lucky and like the way it is the first time. I also experiment every single time I cook, so most of my recipes don’t ever turn out the same way they did the first time I made it, and that’s really just because I like to try new things and see what works.
So here’s how I made my Vegan Yaki Bowl!
Serves: 4
Ingredients:
For the Teriyaki Sauce:
For the tofu:
Before you start cooking, begin by pressing your tofu. I have a tofu press that works wonders, but you can do this pretty easily by putting down a clean towel and wrapping your tofu evenly. Then add something heavy, like a cast iron skillet or a few books and wait for fifteen or so minutes. Then, change the tofu to a dry part of the towel and repeat until the tofu is drained to your preference. The dryer the better.
Start by cooking your brown rice (or grain of choice). I can’t for the life of me cook rice on the stove, so I use my rice cooker. I add one cup of brown rice (and wash it well until the water runs clear) to the pot of my rice cooker and then add about a cup to a cup and a half of water. I also add a bit of rice vinegar for flavor (around 1/2 a tablespoon).
Next, prep all your vegetables and set those all aside in a bowl.
Now you should start your teriyaki sauce. Add all the liquid ingredients to a small saucepan on medium heat. Then add your brown sugar and cornstarch and whisk continuously until the sauce starts to thicken. Bring to a boil and then remove from heat. Continue whisking for around a minute or so. Taste (carefully) and adjust with any seasonings as needed!
Next, prepare your tofu. Remove from the towel or tofu press and cut into cubes. In a large mixing bowl, sprinkle the cubes with cornstarch and toss until they are evenly coated.
Next, add your sesame oil to a large wok or skillet. Let the oil heat up and add your ginger and garlic. Then add your cubed tofu and let brown on all sides. Add your vegetables and coat in most of the sauce. Leave around a 1/4 of a cup for later.
Mix everything and combine evenly. Cook until vegetables are nice and soft and fragrant. On medium heat, this took me around seven or so minutes. Now add your rice and the rest of the teriyaki sauce and stir to combine again. Cook for around six-seven more minutes.
Now you can eat! Feel free to use chopsticks to eat (or a fork, I won’t judge).
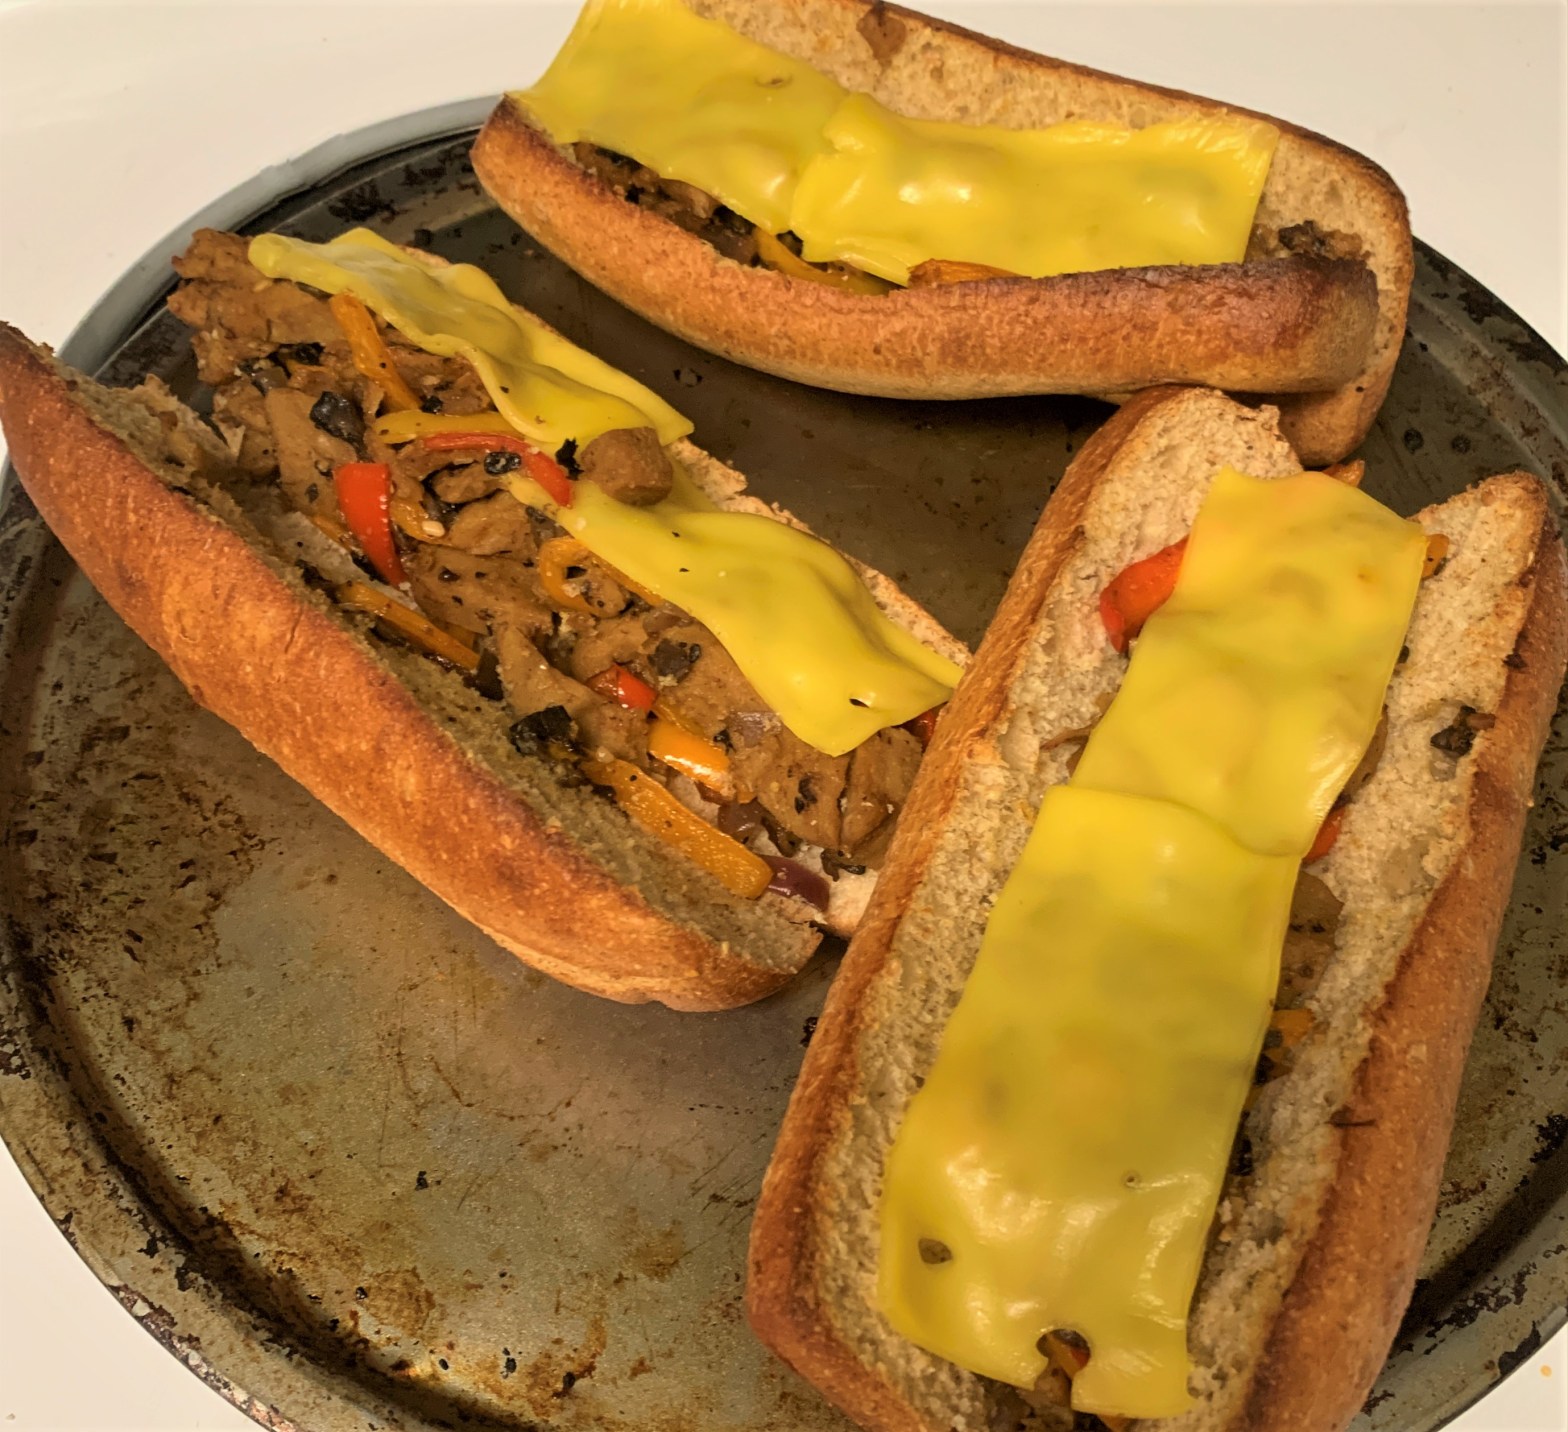
One of the “hardest pills to swallow” for me when I became vegan was the fact that there were so many childhood favorites that I wouldn’t be able to have anymore. One of those was a Philly Cheese Steak Sandwich from a mom-and-pop restaurant in my hometown in Southern Georgia. After talking to one of my amazingly helpful vegan friends, I realized that there really wasn’t anything to be so upset over. I could very easily make my own Philly Cheese Steak, but vegan.
So I did.
I had a pretty good knowledge of how to make this going in just by what I’ve already made, so this was a really easy recreation.
To make this vegan philly, I used store-bought seitan strips and vegan cheese, and fresh peppers, onions, and mushrooms. It’s such a simple, easy recipe that tastes amazing. I think I got everything for this recipe for under 15$.
Serves: 4
Ingredients:
For the sandwich:
Filling:
First, start by preheating your oven to around 400 degrees farenheit. Oven temps do vary, so keep an eye on your sandwiches when they go in.
Next, heat up a nonstick skillet with an oil of your choice. I usually just use olive oil. Once the oil is heated, add your garlic and onions. Cook for two to three minutes or until soft and fragrant. Next, add your peppers and mushrooms and cook until soft, 4-5 minutes. Then add your seitan and seasonings and cook another minute or so, making sure everything is combined really well.
Now that your filling is ready, slice open your sub rolls slightly, but not all the way. Stuff about a ¼ of the filling into each roll. Divide whatever you have left over into each roll. Then, take your vegan cheese and slice in half and fit on top of the filling of your sandwiches.
Put the sandwiches in the oven for five-ten minutes depending on your oven (make sure to keep an eye on them so the bread doesn’t burn) and take out once the cheese is nice and melted.
Now eat! I hope you enjoy!
One of the very first things I tried to do after going vegan was make a plant-based alfredo sauce. And when I tell you that I failed miserably, I am not kidding. I don’t think I realized that to blend nuts properly, you really do have to have a pretty powerful (and expensive) blender. My 20$ Walmart blender just could not keep up with what I wanted to do.
So, I had to improvise. After scouring the internet, I managed to find a pretty easy sauce that I was able to replicate a few times before I felt comfortable creating my own. The sauce that this is based on is Minimalist Baker’s sauce that she lists on her site under her recipe “Vegan Garlic Pasta with Roasted Tomatoes,” which you can find here. This is a recipe that I make ALL THE TIME. It is so good and truly a staple in my home. I seriously recommend trying it. A huge thanks to her for being my unknown-to-her vegan guru. She has helped me understand so much about vegan cooking and cooking in general.
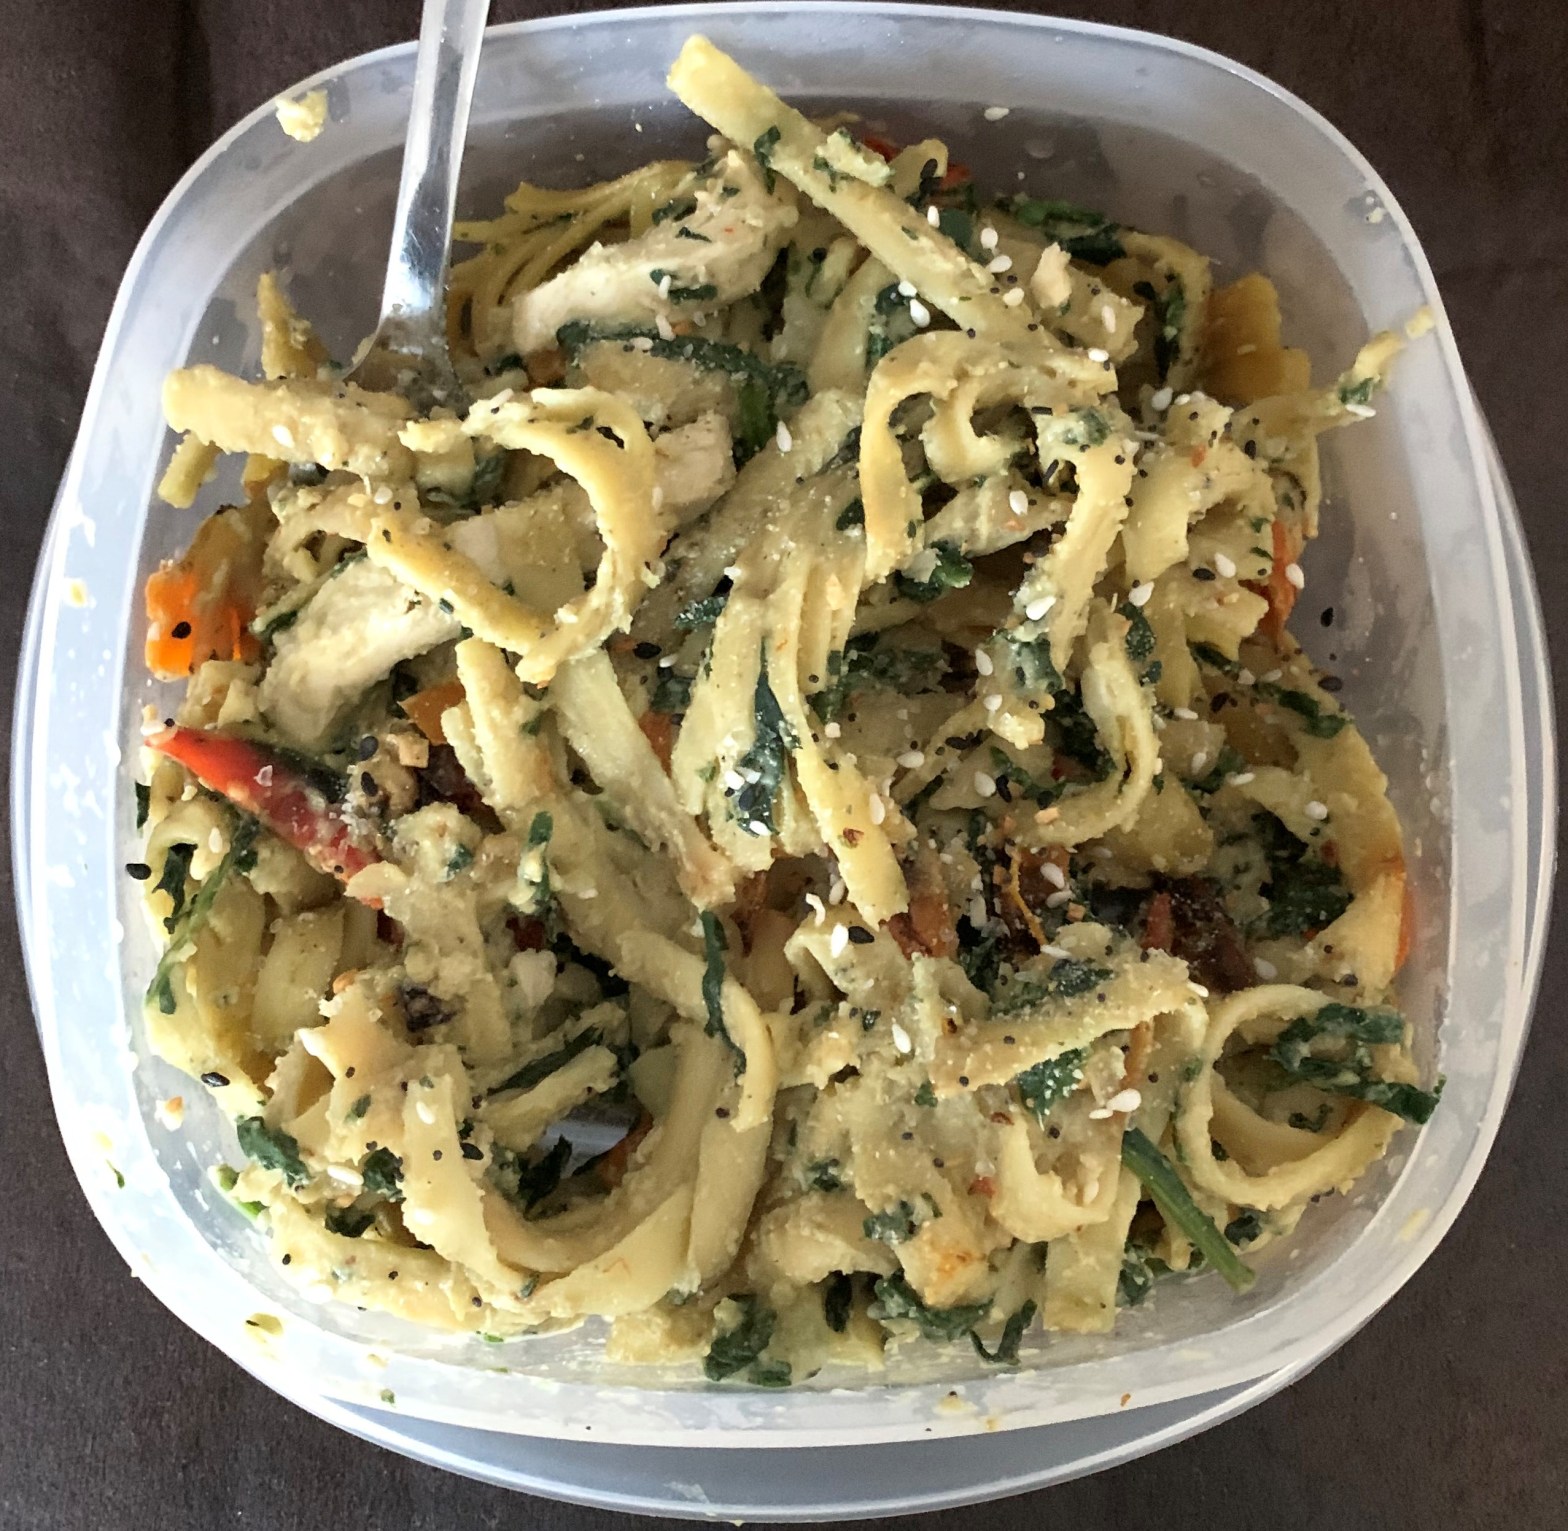
As for my pasta, though, I wanted the sauce to be a little different. More cheesy and with more kick and a deeper depth of flavors that I really enjoy, so with this in mind, I started my experiments. Around ten or so iterations later, I finally had something I really enjoyed.
One thing that I love about this sauce and pasta recipe is that you can quite literally take it in any direction you want. Change up the veg of choice or even some seasonings in the sauce and you have something else entirely. For this, I decided to go with red bell peppers and around half a bag of a spinach/kale blend, along with two servings of vegan chicken strips (around 24 small strips of the Morningstar brand).
For anyone that wants to know, this serves about two-four people as a main dish depending on how much you eat. When I make this, I usually get around three meals out of it. So, without further ado, here is how I made this delicious pasta!
First, start roasting your vegetables. For the peppers, preheat your oven to 400 degrees Fahrenheit. Cut off the stem of your peppers and slice lengthwise and cut into your desired length. Toss with about a tablespoon of olive oil and a pinch of salt and pepper before putting them into the oven. Roast them for about ten minutes and check on them. If they aren’t done after ten minutes, continue roasting until they are nice and soft and fragrant. Keep a close eye on them or they will burn! It only takes about a minute for them to go past the desired cooked stage, so be careful!
Next, start your pasta. Add your pasta to a pot of boiling water and salt generously. Give the noodles a good stir so they don’t stick together and cook for around 7-8 minutes.
While your pasta is cooking, start your sauce. Add two tablespoons of olive oil to a medium saucepan and let that heat up on medium-low. Once your oil is heated, add your onions and cook for about a minute before adding your garlic. Cook for around three to four minutes or until soft and fragrant. Add your flour and stir generously until all the onions and garlic are coated.
Then, slowly begin to pour in your almond milk while stirring so clumps don’t form. Once all your milk is added, add the rest of the sauce ingredients and whisk together until smooth. Bring to a boil and then lower down to a simmer and cook for another five minutes or until it has reached your desired thickness and flavor. Once it’s where you want it, turn the heat down to low and keep warm until your veg and noodles are also ready. Once everything is ready, first add your pasta to the sauce and stir until everything is evenly coated, then add your vegetables and stir again. Add your vegan chicken strips and stir once more.
Now, you are ready to eat! Enjoy this yummy plate of plant-based pasta with your favorite show or movie and whatever beverage you enjoy most.
Ingredients:
For any of my readers that count calories, I recommend importing this recipe into the MyFitnessPal app for the calorie information. I’ll start adding that information to my recipes soon, though!
Apparently there is some discourse about whether or not active yeast is a vegan ingredient. I say yes because I seriously doubt yeast has the capacity to feel anything. Maybe that’s an immediate turn-off for some, but not for me. When making any sort of dough, you have to use yeast, otherwise it will never rise. So, get a cup of warm (NOT HOT – THIS WILL KILL THE YEAST) water and pour it into the bowl of a stand mixer (or a large mixing bowl if using your hands to knead or a hand mixer). Add a teaspoon of sugar and wait ten minutes.
When you come back to the yeast, it should be foamy and noticeably different than when you first put it into the bowl. If it hasn’t changed, wait another five minutes. If there is still no change – throw it out and start over. I won’t lie, I totally screwed up my first batch of this and had to start over, so don’t feel too bad if you also do. If you really want to avoid this, follow the instructions on the yeast packet like you are supposed to instead of just winging it like me. Once your yeast mixture is ready, add your salt and your olive oil, then turn your stand mixer on low and start slowly adding flour as you mix it. Once it is all combined pretty well, dust your work surface with flour and take out your dough. Start kneading it by hand until you have a pretty smooth ball. Once it’s at that stage, add it to a bowl and brush with olive oil. Cover it with saran wrap or some sort of covering and let it sit in warm area for an hour or until it has doubled in size.
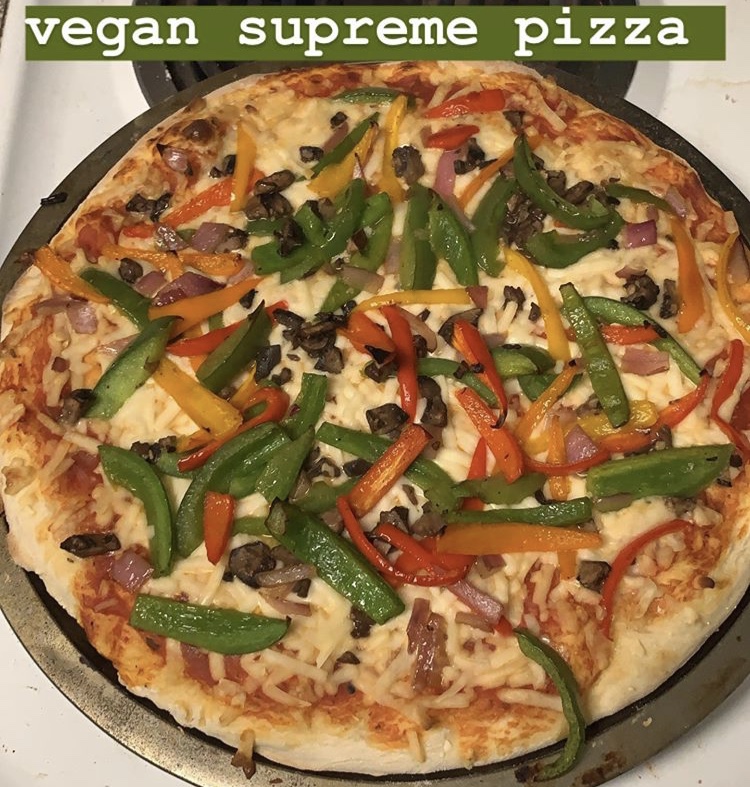
Once the dough is ready, take it out of the bowl and cut it in half. Now you have enough dough for two pizzas! Yay! Set one piece of dough aside. Take the other piece of dough and roll it out until it is about 12 inches across. I used a rolling pin for a little bit and once it felt good enough, transferred it to a pizza pan and finished stretching it there. Now you can make your sauce. This is really simple and very customizable if you hate some of the spices I used. Basically all you do is add your canned tomato sauce to a pot on the stove and heat it up. I had mine on medium low. Once it is heated, add your spices to taste and let it simmer while you get ready to do everything else. Once it is how you want it, add your sauce to the dough. I used around half a cup to a cup of sauce, but this is really just however you want it to be. Then add your vegan cheese of choice – I used the So Delicious Vegan Mozzarella. It melts super well and is very creamy. It also tastes very similar to real mozzarella according to my non-vegan Wisconsin native best friend, so I think that’s a good testament to how yummy it is.
Next, put the pizza in the oven. It should be ready at 450 degrees. Here is the important part: cook time will vary depending on your oven. Start with ten minutes and check after that. If the dough seems really gooey, add another five minutes, but keep a careful eye on it or it will burn. Once it’s done, take it out of the oven and cut immediately. Then eat it, baby! Congrats, you just made your own pizza and absolutely zero animals were harmed in making it!
Ingredients:
For the dough:
For the sauce:
For the pizzas themselves:
Truth be told, before I decided to go all the way vegan, I tried to just go dairy free. This was really only because I developed a sudden (very severe) milk allergy. It is pretty rare for adults to be allergic to milk, so I was pretty shocked when I ate some ice cream and went into anaphylactic shock (or anaphylaxis as some may know it). A few tests and an E.R. visit later and my doctors determined that I am now allergic to cow’s milk. I don’t eat any other animal milk products like goat milk because my allergist warned me there that I would most likely also have a reaction to those. I was bummed for a while before I realized that this would be my perfect opportunity to go vegan. I had always wanted to, it just never seemed practical until this point. I am living on a college student’s budget, and whether or not some vegans want to admit it, going vegan can be really expensive. My days of living (albeit very unhealthily) off of ramen noodles with a dash of soy sauce were over. I had to make a change and I was really excited about it.
So, once I fully began my journey of going fully vegan, I noted some immediate changes. One: I felt truly so much better. A vegan diet isn’t for everyone (though in a perfect world it would be), so I was very excited that I found immediate results in how my body felt. I also found that finding vegan substitutes for my favorite foods wasn’t that difficult (for at least some of them. Some substitutions for things are very expensive and I have had to make do without those for now, as I’m sure a lot of new vegans have as well). So, after eating a few different frozen vegan pizzas, I found that this area of readily accessible vegan food is just severely lacking. So, I decided to make one myself, for as cheaply and easily as possible. On this blog, you’ll be able to read and make everything I’ve found so far!
Hi! If you clicked this, you probably want to know a little more about me. My name is Madison Brown. I am a 21-year-old college student currently living in Augusta, GA. At the time of writing this, which is early January 2020, I have been vegan for around five months.
I am currently studying English Lit at Augusta University and I plan to go to graduate school to study Children’s Literature. I am especially interested in why we let children read the books that they do, so my research lies heavily in the field of violence in Children’s Lit. I also enjoy writing poetry and of course, cooking.
I’ve been cooking for as long as I can remember, even when it was just helping my mom crack eggs into whatever she was making. I have so many wonderful memories surrounding cooking and I am very fortunate to be able to keep making more in a healthier, safer for animals, way that I still very much enjoy.
As for what I like to cook, I cook a lot of Italian and Asian dishes, though I don’t and will never claim to be an “authentic” cook in either of those fields. I was born and raised in America and everything I have learned how to do I owe to other cooks and the food network. One of my goals in 2020, though, is to get better at cooking the food I do and branch out into new cuisines I haven’t had a lot of and do my best to make them vegan and still do them justice.
Another thing that I really enjoy is baking. I am still very new to baking so everything I make at this point is very trial and error, but I love how methodical it is and being able to eat a lot of dessert whenever I do fail at making something “blog” worthy.
Hopefully you’ve learned a little bit about me and want to stick around and maybe try making some of my favorite recipes that I’ve published so far!
